Fabric Care and Stain Removal Tips for Your Clothing: Grab Your Free Downloadable Poster!
Read more
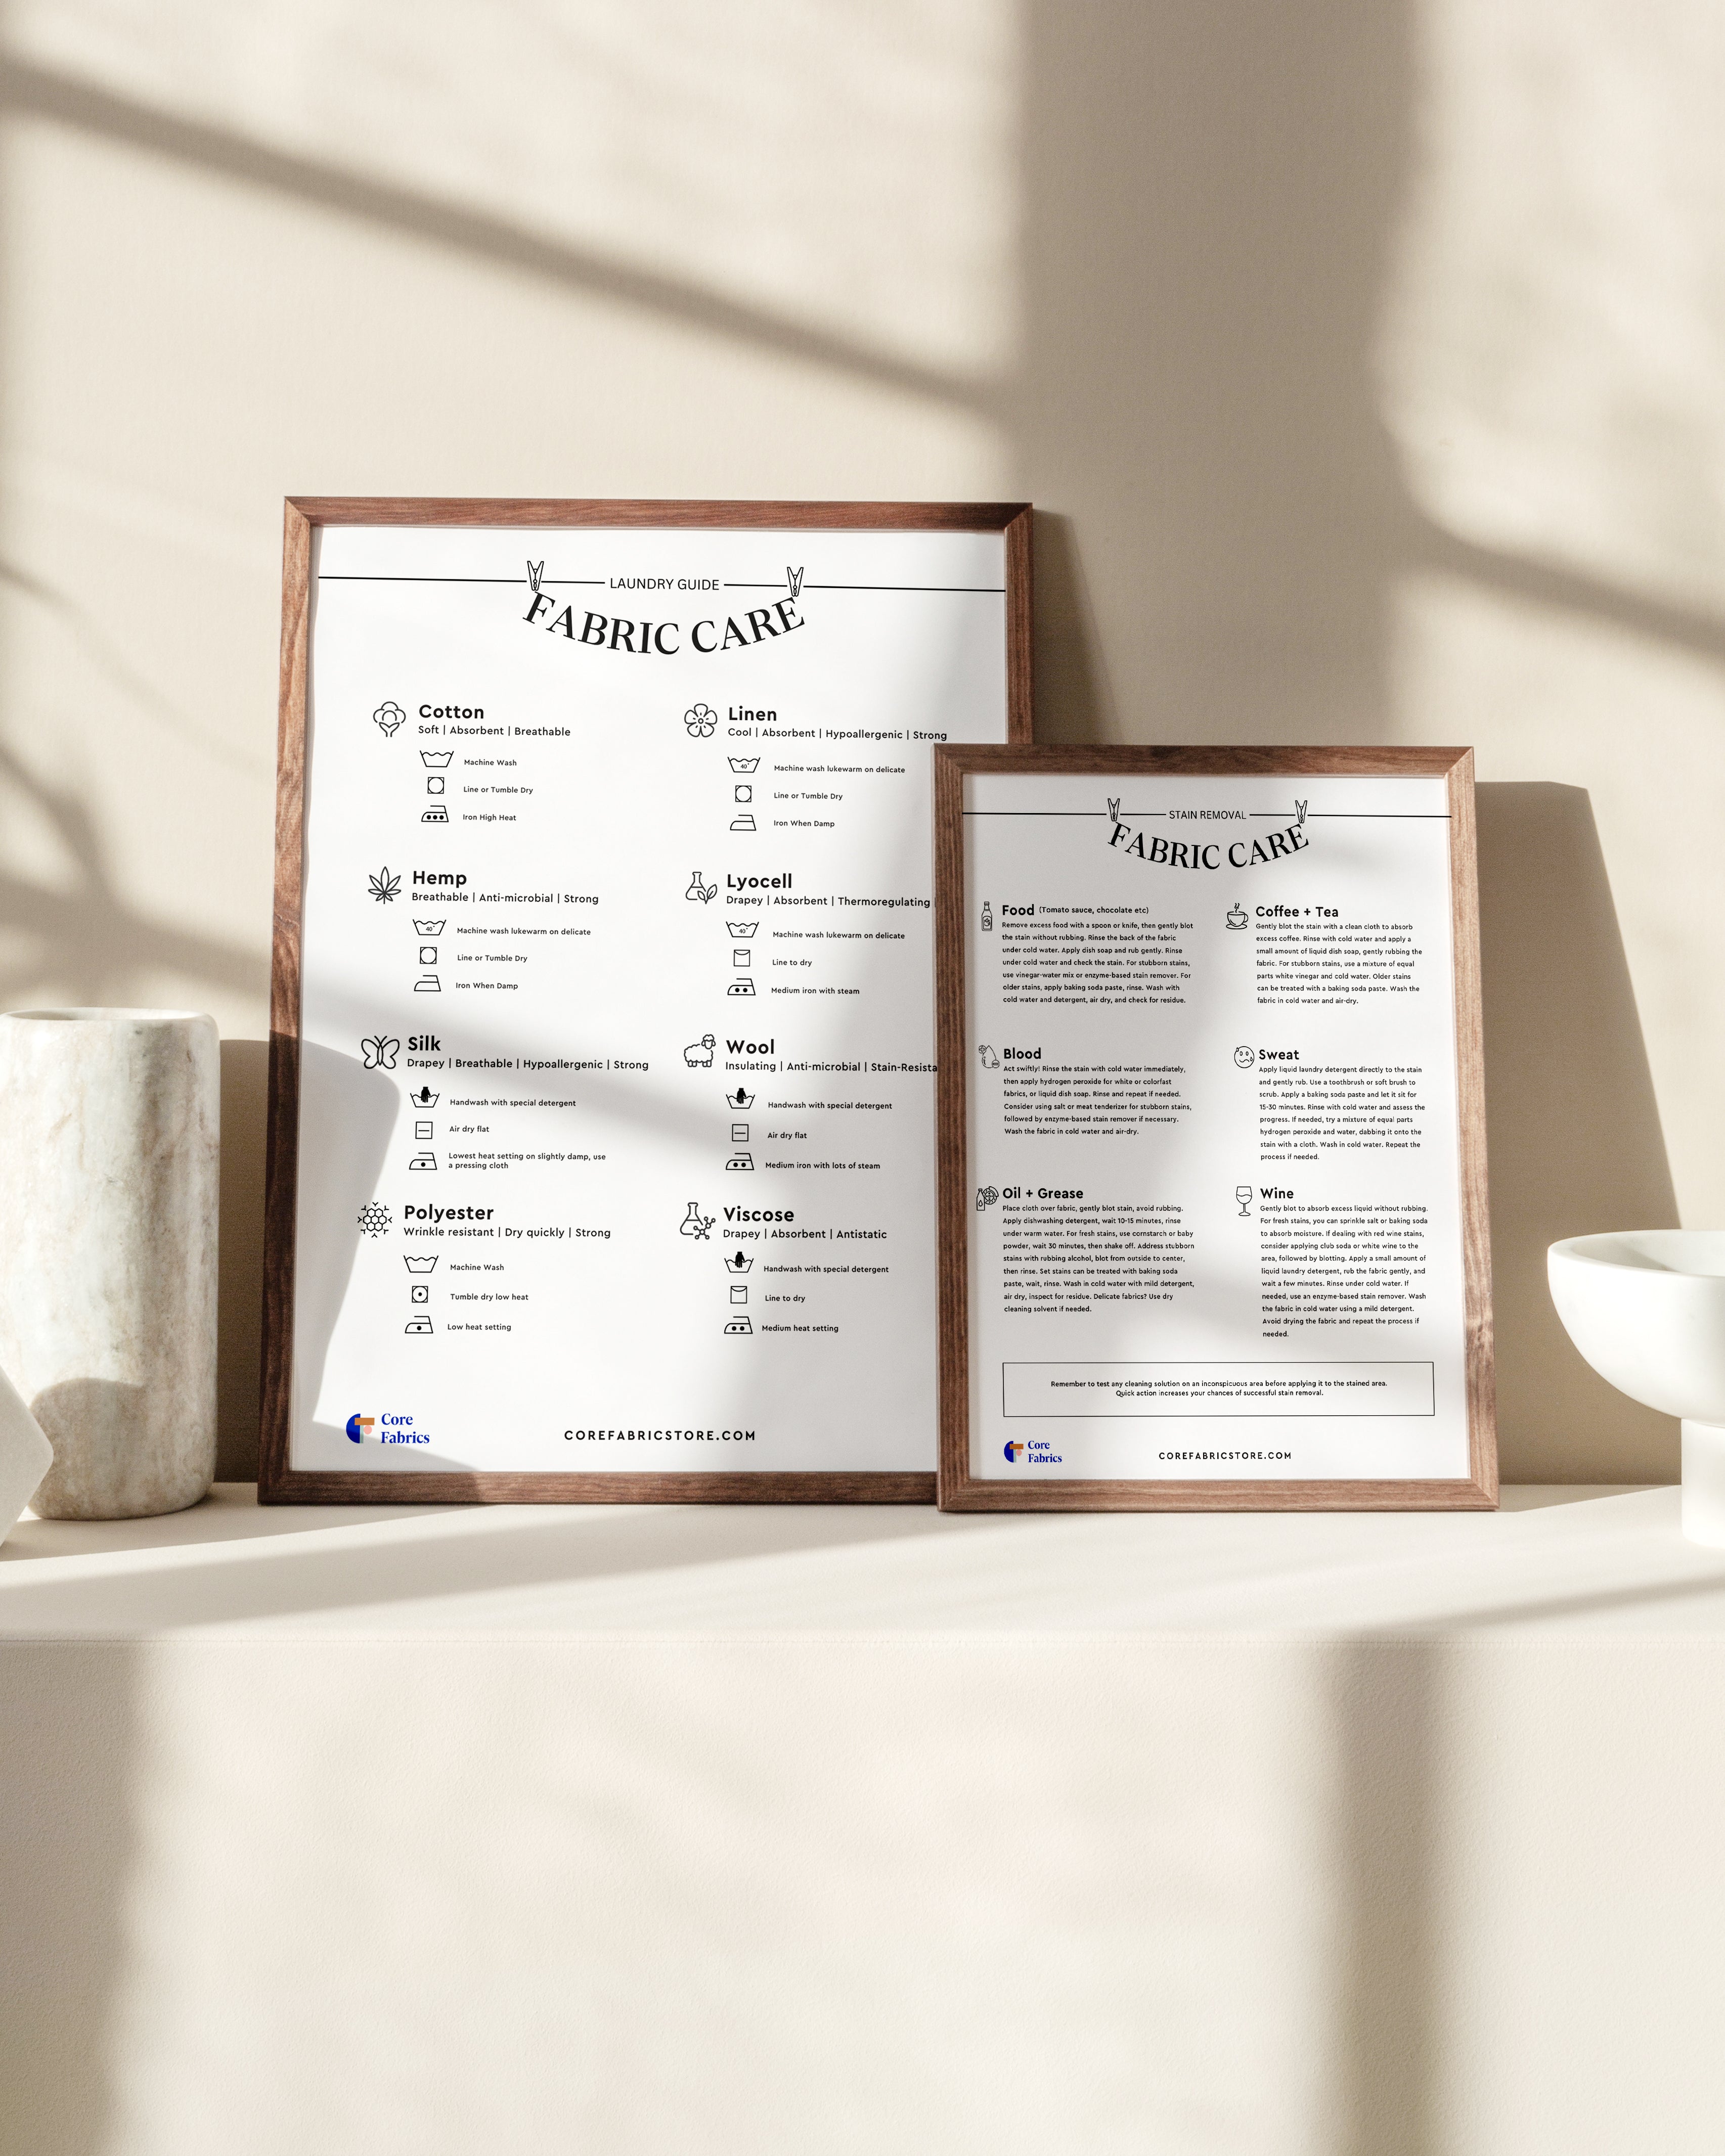
Free downloadable guide to master the art of fabric care

It's a common scenario for all of us fabric enthusiasts. You're bursting with excitement over your latest garment idea, and you rush to your fabric stash, only to find it in a state of utter chaos – a seemingly impenetrable mess. Digging out that perfect pocketing cotton from a mountain of fabrics can be daunting, and it's even tougher to assess your inventory at a glance. But fear not, we've got your back! To rescue you from this fabric stash frenzy, we've compiled a list of internet-friendly fabric storage ideas to transform your stash from a mess to its very best.

Here at Core Fabrics, we handle a ton of fabric. When we're busy fulfilling orders, we neatly stack each fabric cut on convenient shelves before shipping them off. To get around the issue of having ten near-identical cuts of indigo denim being confused for each other, we've developed a clever tagging system. Each cut of yardage is safety-pinned with a little tag that notes the fabric name, type, width, care instructions, and length. Once identified, they stay on the shelf before being lovingly packed and sent your way!
You can easily adopt this strategy for your home fabric stash. Print our downloadable hangtag template, fill in the necessary details, and voilà – you've identified those mystery scraps! Need help deciphering your stash? Check out our burn test guide for assistance.
While we use safety pins and string in our studio to attach tags, you can get creative with your labelling. Print labels directly onto stickers and attach them to your fabric, or clip a label to the selvedge of each piece with a binder clip. You can even use a tagging gun for a more professional touch. The choice is yours!
Whether you decide to organize your fabric by colour, fibre type, width, length, sentimental value, or some other method known only to you, organization is key. It's a good idea to sketch out a rough plan – even if it's just a note to group all cotton fabrics in the top right and all wools in the bottom left. The more precise you are about your organization now, the easier it will be for your future self. Remember, taking care of your stash is an act of self-care!
If you intend to store your stash in places that aren't immediately visible, consider maintaining a list of all your fabrics, including yardage, width, and fabric type. We recommend using an app like Evernote, Trello or Google Drive to upload pictures and all your fabric information. This way, when planning a new project, you won't need to physically rummage through your stash to know what's available. Be prepared for regular updates to your inventory as you use or add fabrics.

Everyone's space is unique, so choose a storage method that suits your needs. If space is limited, try crafting cardboard "bolts" from box flaps or cereal boxes. Wrap the folded fabric around these "bolts" for easy storage on shelves or linen closets, organized according to your established categories.
If you have access to a closet with a rod, you can hang your yardage on clothes hangers and browse through them at your convenience. This method also works for patterns and pattern hangers, allowing you to create an all-in-one sewing closet. Multi-rod style hangers, like pants hangers, are particularly efficient, maximizing your storage per hanger.
Regardless of your storage setup, there's one crucial step – the tried-and-true technique of emptying your stash and neatly refolding every single piece. While it may require some elbow grease, this labour of love will tidy up your fabric storage and make it easier to identify patterns, colours, and more at a glance. Put on a podcast or your favourite album; before you know it, you'll be done.

For consistency, fold with a template to ensure that all your yardage is roughly the same size. This template can be made of paper, cardboard, or you can use the end of a quilting ruler to guide your folds. Aim for dimensions that balance compactness and suitability for heavier fabrics. A size around 12"x 8" or the classic printer paper size of 9.5"x 11" works well. If using a quilting ruler, consider a size 10"x 6" for a similarly proportioned rectangle. If you don't feel like crafting your own template, check out this handy set of poster boards and alligator clips. This combination works great for organizing fabrics and keeping them straight and visible.
Once everything is neatly folded, you can display your stash on shelves, store it in bins (under-the-bed bins are perfect for this), arrange folded yardages in milk crates like a classic record store, roll them into bundles for easy storage, or stack them in cheerful piles around your home. The key is to make your stash accessible, easy to browse, and effortless to return to its designated spot.

Now that your yardage is neatly organized and labelled, what do you do with all those tiny fabric remnants? They're an inevitable part of the sewing journey unless you're committed to no-waste patterns (in which case, kudos to you).
Once you've gathered a pile of scraps, consider one of our favourite stash-busting projects: The Pouf! This easy-to-sew item comes together quickly and can use a surprising amount of scraps to fill. I use mine to store seasonal fabrics waiting to be incorporated into a project. The beauty of the Pouf is its scalability – if you have lots of scraps, make a big Pouf; if you have only a few, make a small one. Detailed instructions and the pattern can be found here.
Scrapbusting also lends itself to quilting projects, especially if you can group your scraps into fat quarter-sized chunks. Don't hesitate to piece together functional patterns, like a denim jacket yoke made from scraps – it's part creative use of remnants, part fashion statement. You can also craft pot holders, sleep masks, dog coats, and more from your remnants.
For those who want to maximize every shred of fabric, consider making paper from the tiniest scraps. We're talking really tiny here. The process is similar to making paper from paper scraps – blend your material into a pulp, add water, and filter the pulp through a fine screen. Due to the fabric fibres, your finished paper will have a unique texture and be significantly sturdier than typical printer paper. Plus, it will be visually stunning.
With your stash now neatly organized, remnants put to good use, studio cleaned, floor swept, and everything else in order, there's only one thing left to do – take full advantage of your hard work and sew up a storm!
Congratulations! Go forth and create something beautiful!