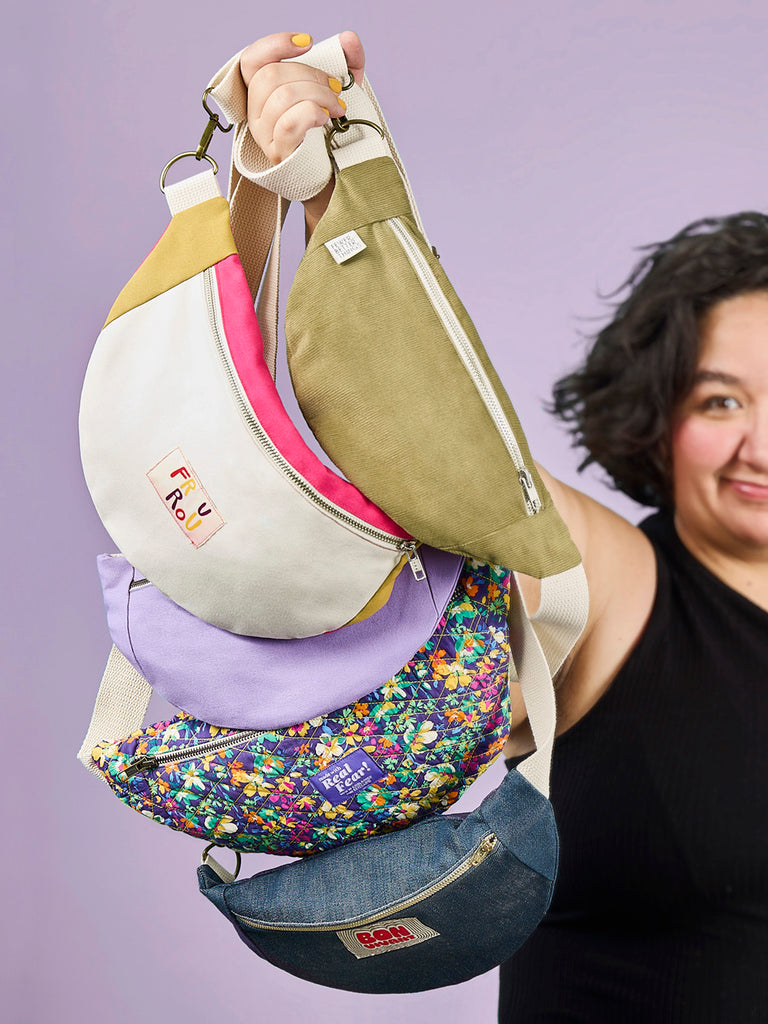
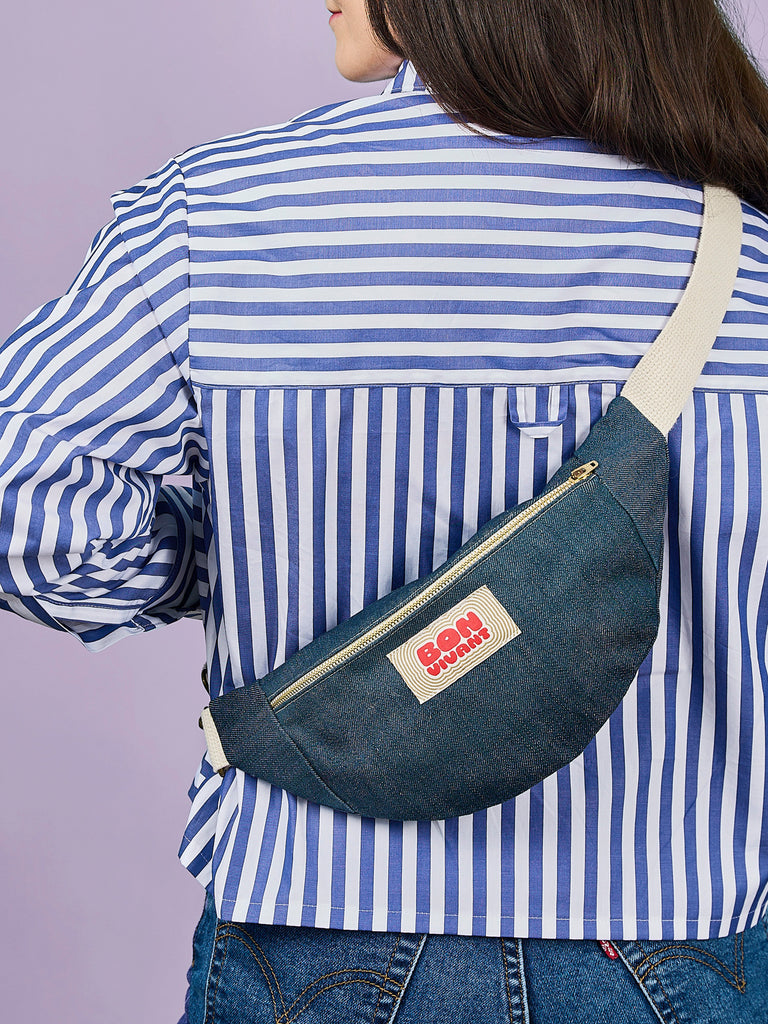
Sew a Crossbody Bag with our Free Belt Bag Pattern!
Step up your on-the-go game with our FREE Core Belt Bag pattern! Whether you rock it as a crossbody, fanny pack, waist bag, moon bag, or sac banane, this accessory blends style with practicality. Plus, it's fun to sew! Simply download our Free Core Belt pattern below and we'll guide you every step of the way through the sewing process, ensuring a seamless experience from start to finish.
Do you prefer learning by video? Check out our handy sew-along video at the end of this post.
Designed to work with a variety of fabrics, our Core Belt Bag comes in two sizes: the small version (13"W x 6"H) fits essentials like your phone, wallet, and keys, while the large version (15"W x 8"H) is ideal for those must-have extras (think small notebook, charger, and snacks). Fully lined and boasting a front zipper, an optional inside pocket, a swivel hook, and an adjustable strap with slider buckle, which you can get in our all-in-one Core Belt Bag Hardware Kit, it's a versatile + cute little bag.
With the small size requiring less than a 1/4 yard of fabric, it's the perfect project for stash-busting and adding a matching accessory to your wardrobe.
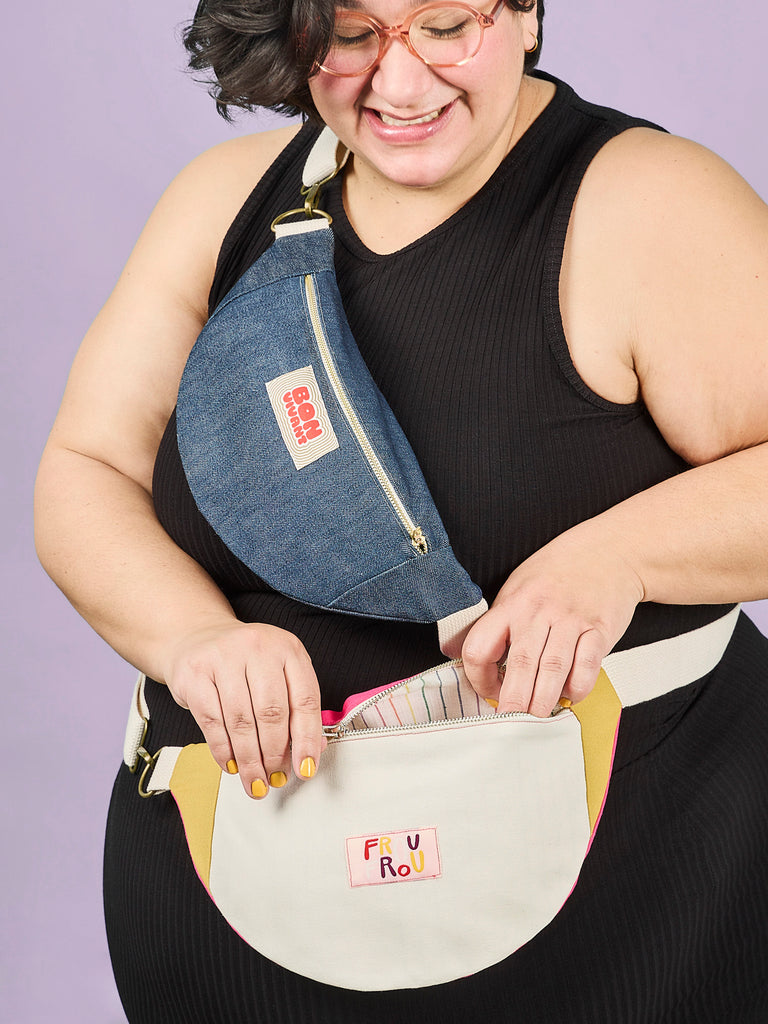
Ready to sew your fanny pack(s)? Follow our tutorial to create a functional little bag that will suit your style to a tee.
Download the Free Pattern:
(If you don't see the box above, please authorize this page on your popup blocker)
Fabric Choices for Your Belt Bag:
The Core Belt Bag can be made using any stable mid to heavy bottomweight fabrics like denim, twill, canvas, and corduroy. You can also use waterproof fabrics like waxed cotton or waterproof softshell. You can also quilt your own fabric and add batting. For a strong lining, choose a stable and sturdy woven like quilting cotton, cotton broadcloth, and light to midweight cotton twill.
The Core Belt Bag Hardware Kit which includes the following:
Two yards of 1.5" webbing in cream or black
One 1.5" (38 mm) wide D-ring
One 1.5" (38 mm) wide slider buckle
One 1.5" (38 mm) wide swivel hook
** If you don't have the hardware above, you can also sub in the buckles and swivel hook by sewing the webbing directly into the side seams and closing with a simple plastic buckle.
One 16" or longer zipper (zipper is longer than final measurement and we'll adjust the length when sewing it)
If you prefer following along by video, we have filmed the entire process! Otherwise follow along with our step-by-step instructions below.
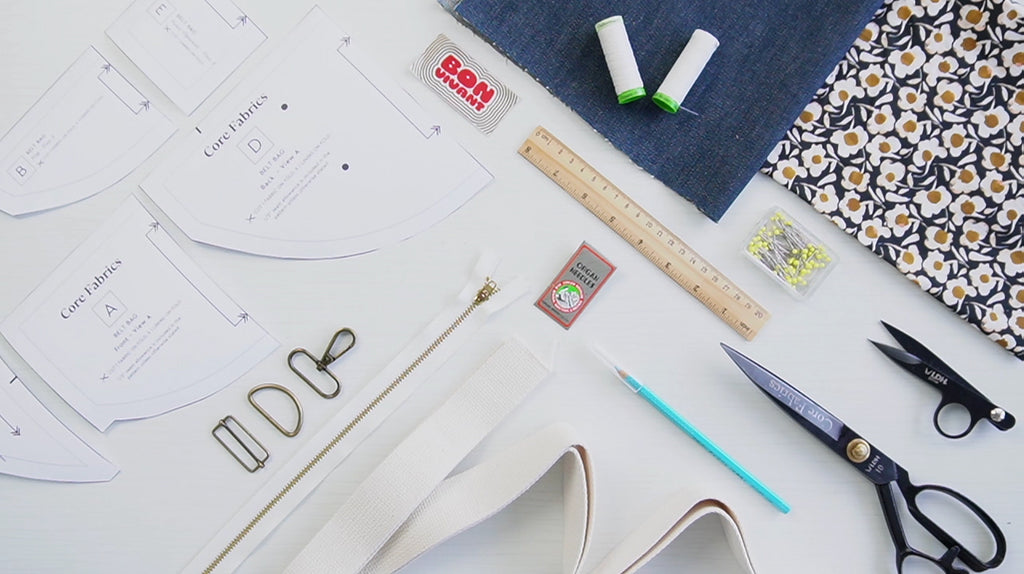
Step 1: Gather Your Tools and Prepare Materials
Begin by gathering all necessary materials and pattern pieces. Note that seam allowances are 1/2 inch unless specified otherwise.
Step 2: Cut Fabric and Transfer Marks
Carefully cut both the main fabric and lining using the provided pattern pieces. Transfer all construction marks and notches onto the fabric and lining to ensure accurate assembly. Marking the centres of the pieces will also help with alignment during assembly.
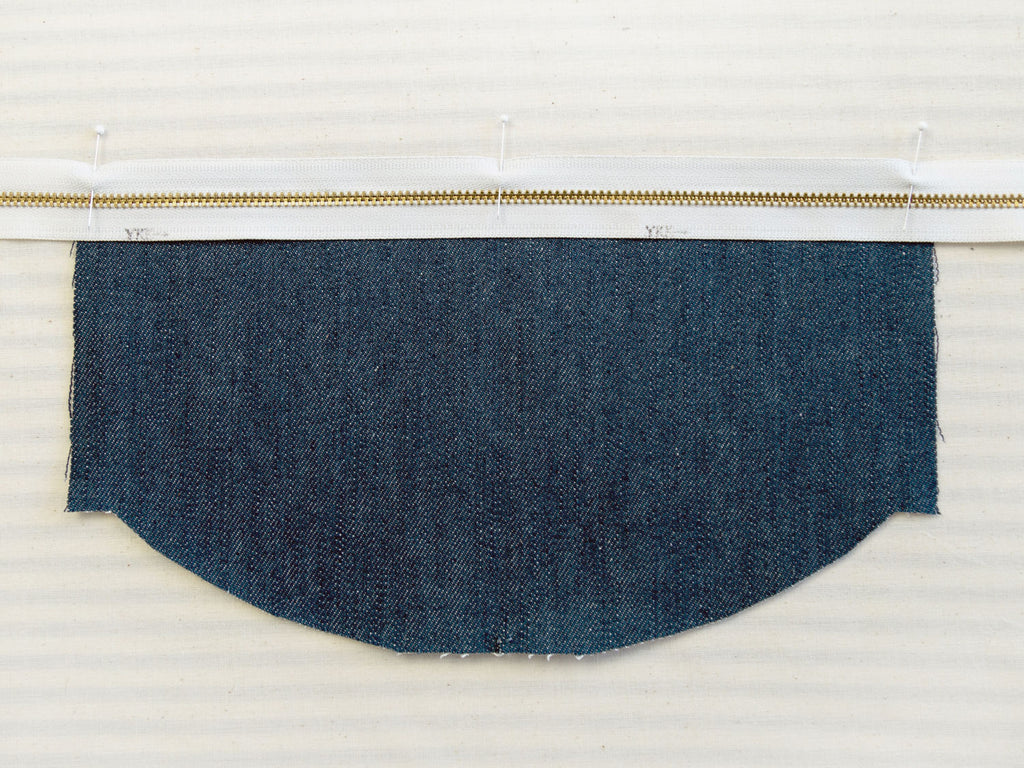
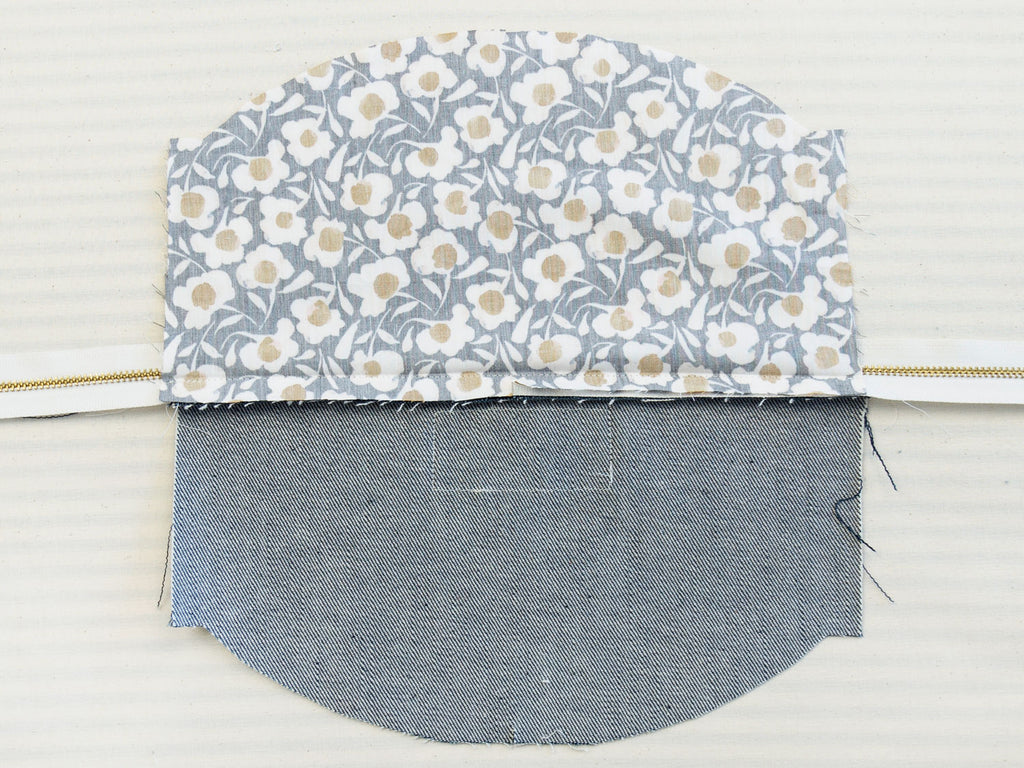
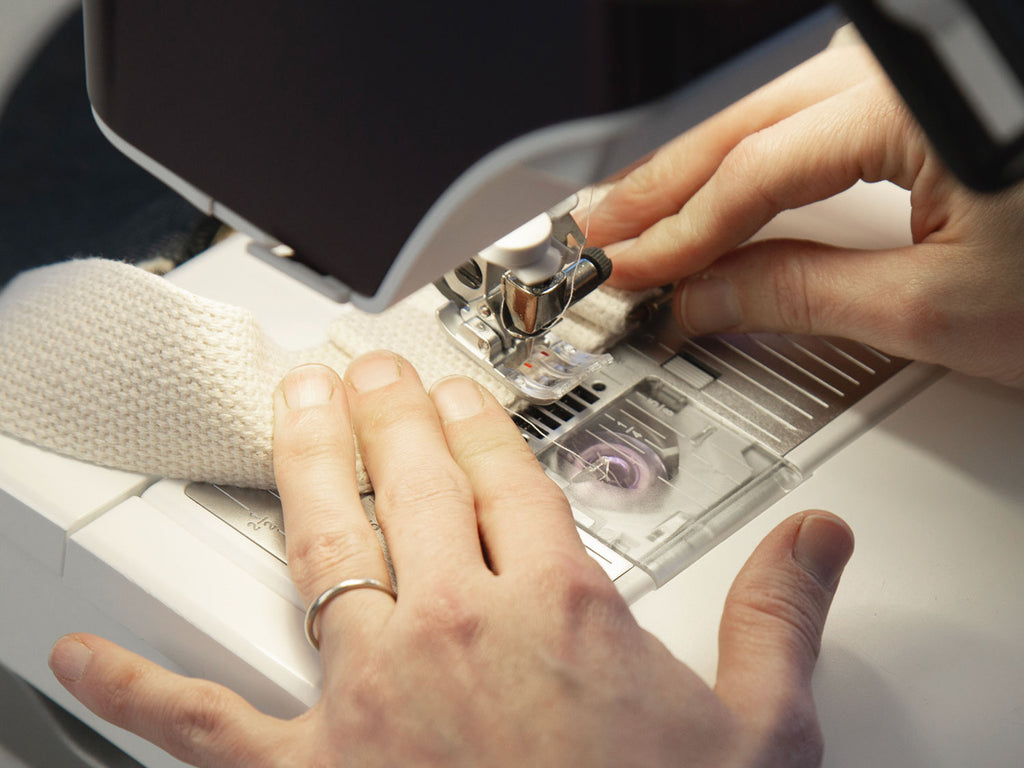
Step 3: Sew Zipper to Front Pieces
Align the closed zipper with the top edge of the Front of main fabric, right sides together. The zipper should be longer than the seam; excess length on the sides makes it easier to assemble during assembly.
Secure the zipper with pins and stitch as close as possible to the zipper teeth using a zipper foot. Slide the zipper to make sure you have enough room to easily move it along the seam. If it sticks, try sewing a slightly smaller seam allowance.
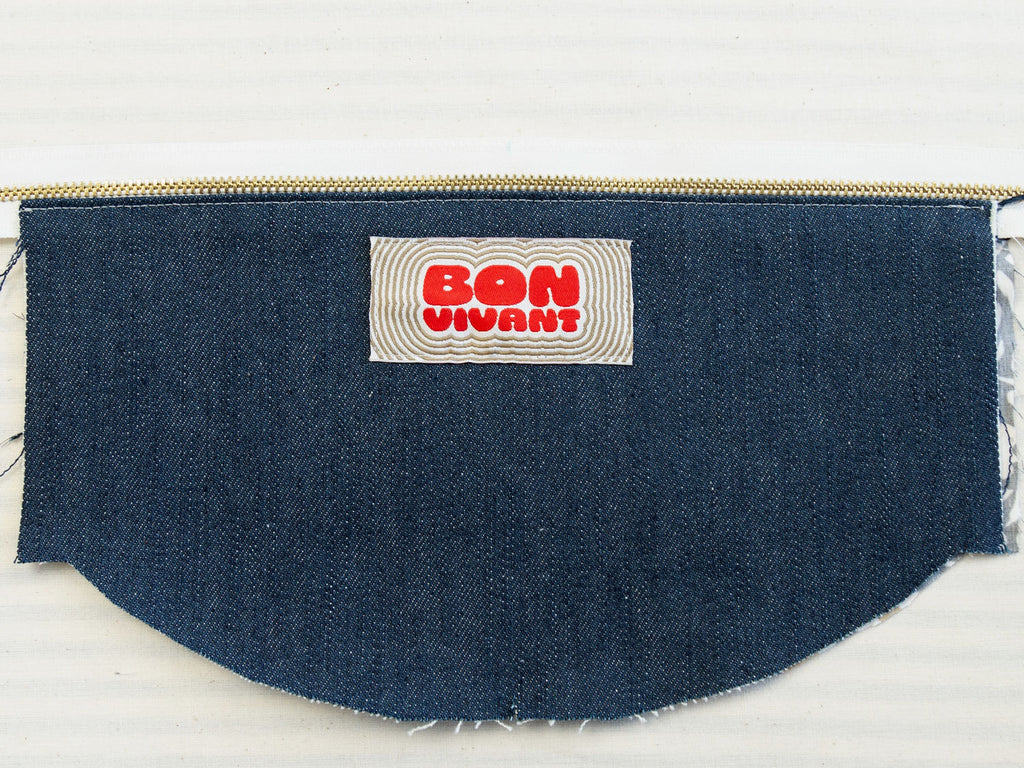
(OPTIONAL) Sew Label: If you've chosen to add a label or patch to the front of your belt bag, it's time to position and sew it.
Next, sandwich the zipper between the lining and the main fabric, right sides together. Pin and stitch on top of the original stitch line.
Press the layers down on both sides, ensuring the zipper teeth are free and clear. Topstitch along the edge on the main fabric to secure all layers together.
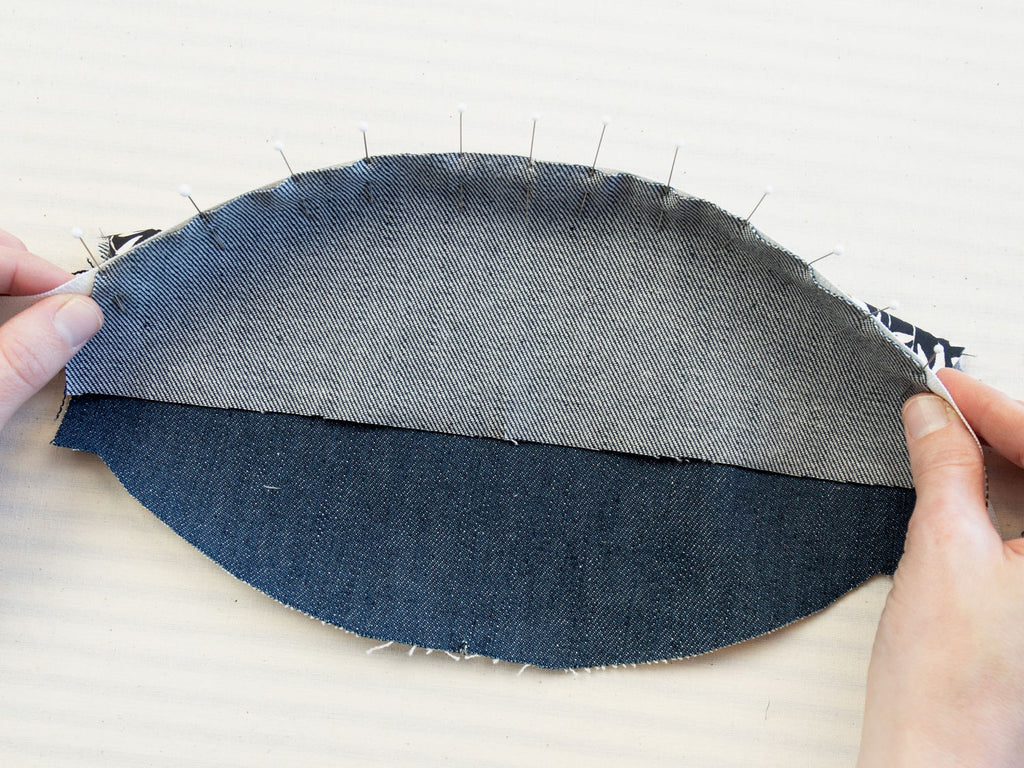
Step 4: Sew Zipper to Flap Pieces
Right sides together, align the zipper to the Flap of the main fabric along the curved edge. To ease sewing around the rounded edge, pin the middle first, followed by each end, and distribute the excess fabric evenly with additional pins.
Stitch carefully along the zipper using a zipper foot. Test the zipper again to make sure it slides freely.
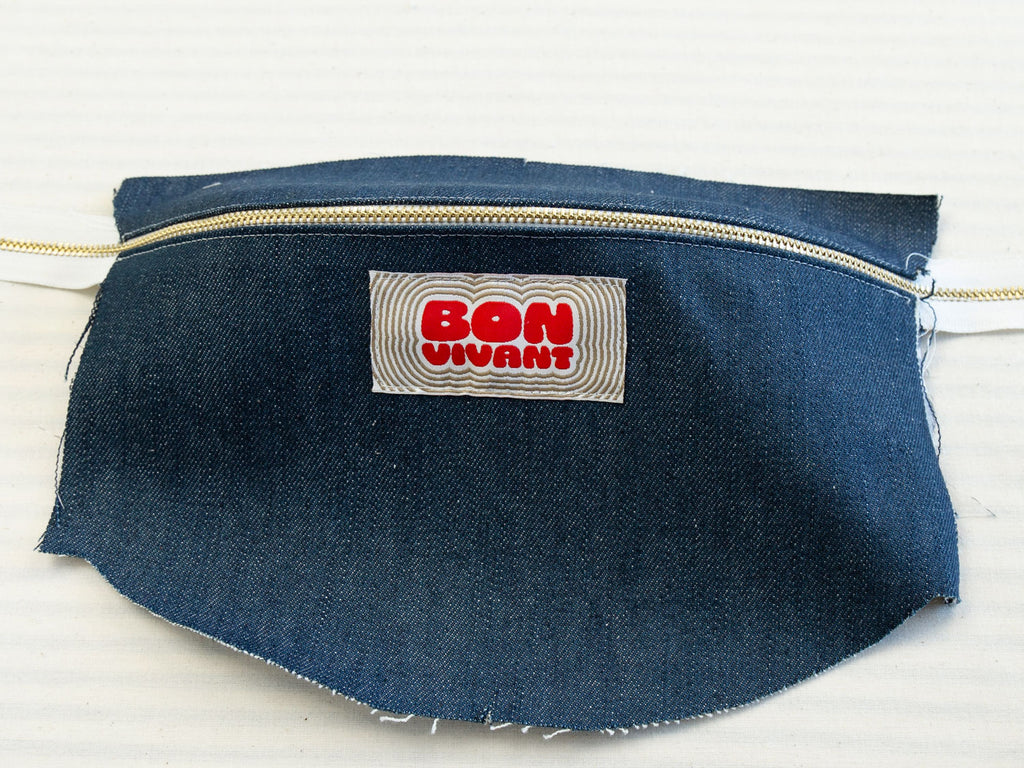
Repeat the same process for the Flap lining, sandwiching the zipper between the lining and main fabric. Secure with pins and stitch along the entire length. Press the layers up and topstitch all layers together.
Slide the zipper towards the centre to avoid interference during subsequent steps. Tack the end of your zipper closed by hand or by machine (be careful not to hit the zipper teeth with your machine needle). This will help hold the zipper closed while sewing the sides.
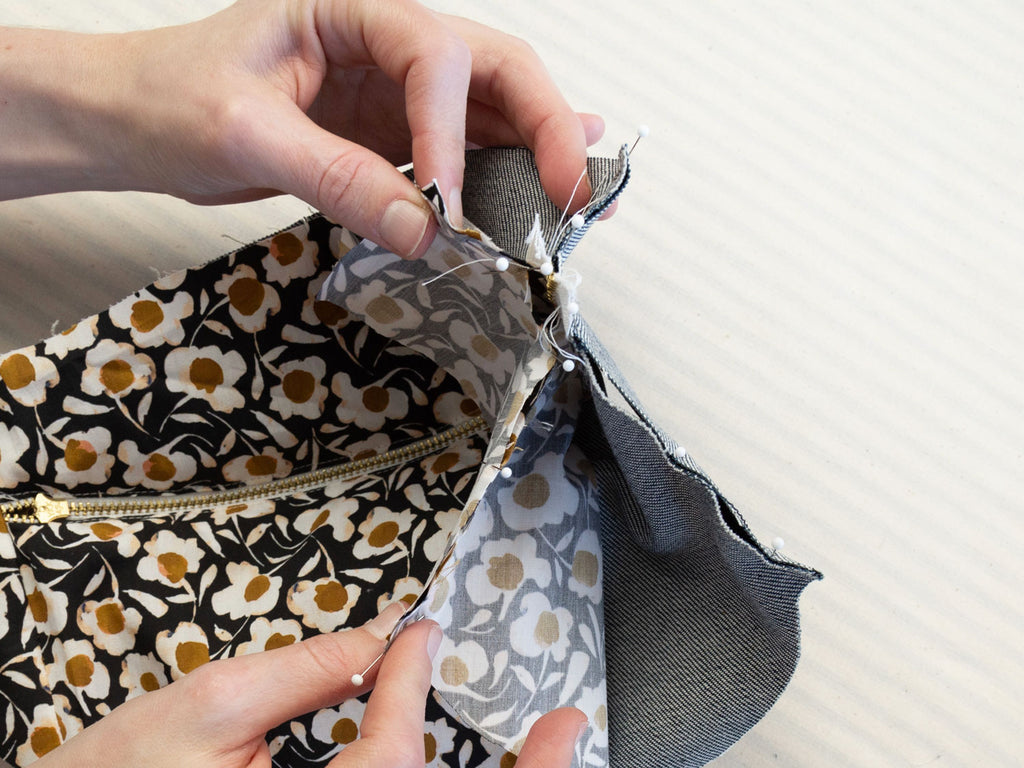
Step 5: Sew Sides to Front Panel
Right sides of main fabric together, align the Side piece to the straight edge of the Front. Pin together above and below the zipper. Repeat for the Side and Front of the lining. The result should look like an X.
Now stitch each section of the X closed, sewing as close as you can to where the layers meet the zipper. You will have a small gap on the lining and main fabric where the zipper is located.
To fill this gap, align all the layers evenly along the straight edge. Stitch for about 1" (25 mm) starting just above the zipper to close the gap. You may need to use the hand wheel to avoid hitting the zipper teeth with your needle. All layers will now be secured around the zipper - flip each side open to ensure it has been sewn smoothly and trim the excess zipper tape on either side. Repeat on the other side of the bag.
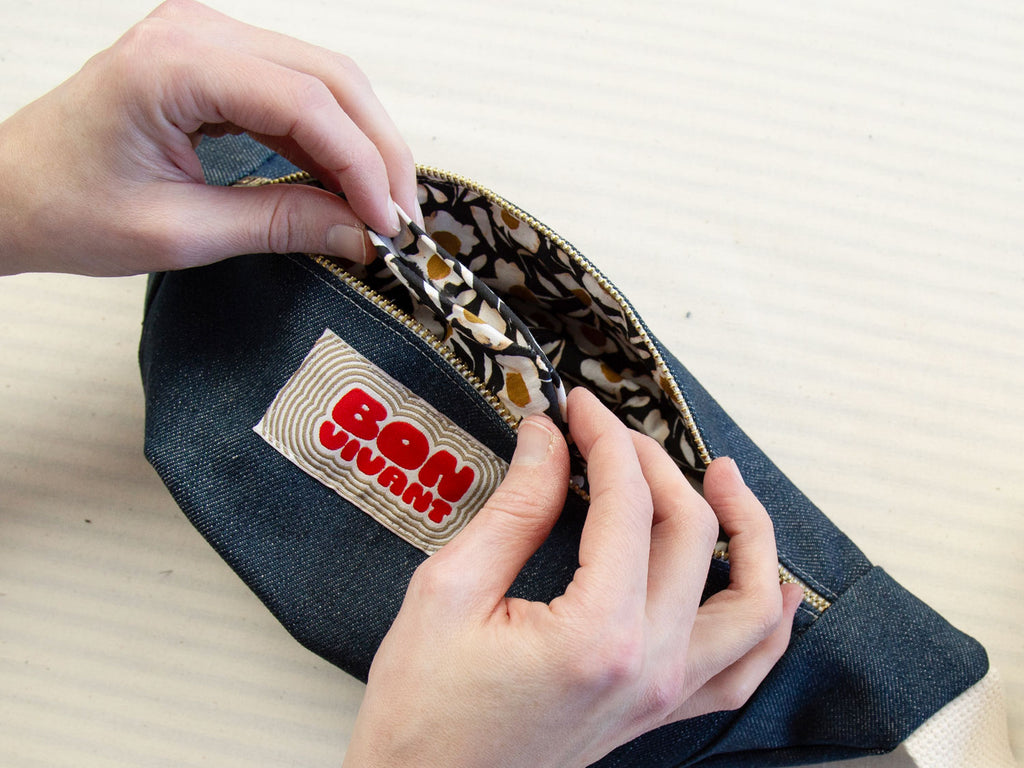
(OPTIONAL) Sew Inside Pocket to Lining Fold top edge of pocket under by 1/8" (3 mm), then again by 3/8" (10 mm), and topstitch in place. Fold the sides and bottom under by 1/2" (13 mm) and press. Wrong side of pocket to right side of lining, attach the pocket to the lining back, aligning with circles. Secure with pins and topstitch along the sides and bottom edges.
Step 6: Sew Webbing Straps to Front Panel
Cut a 2-inch strip of webbing. Align the webbing along the left Side of main fabric; ensure it starts 1/2" (13 mm) below top edge. Stitch in place at 3/8" (10 mm).
Slide the D ring through this webbing, fold in half and stitch again at 3/8" (10 mm) to secure.
Secure the rest of the webbing to the other Side of the main fabric ensuring 1/2" (13 mm) seam allowance along top edge. Roll up the webbing and secure it with an elastic to keep it out of the way. Make sure the zipper is slightly open.
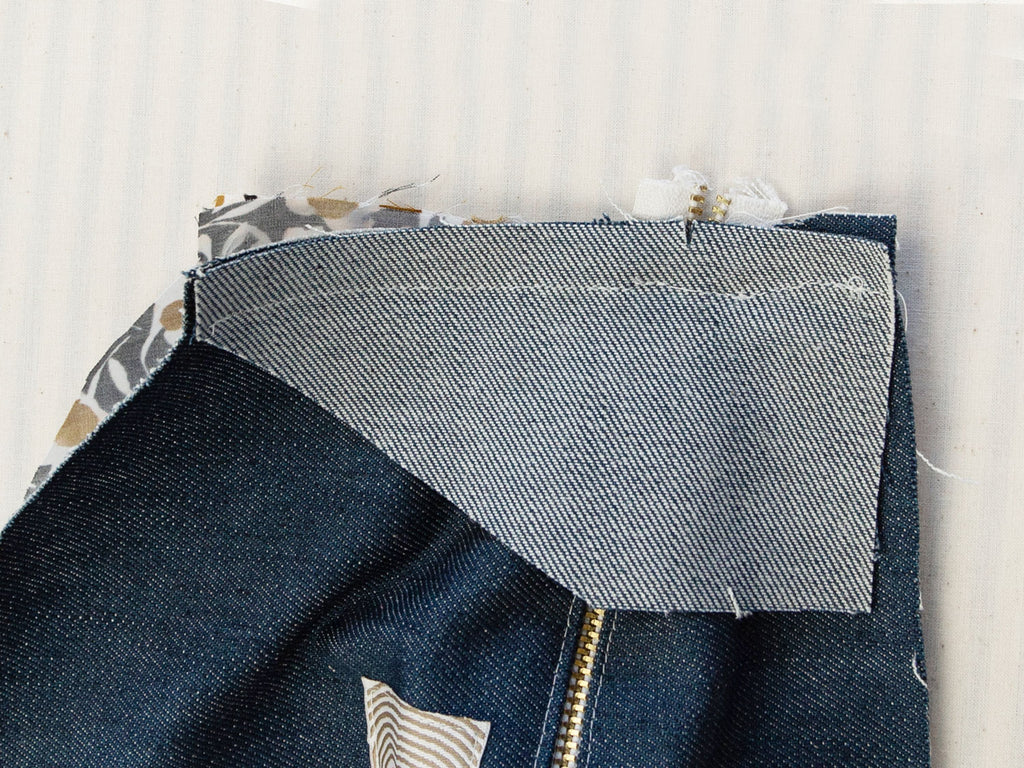
Step 7: Sew Front to Back
Right sides together, align the Back of the main fabric and the Front of the main fabric. Pin together along the edges.
Stitch the sides and curved edge only, leaving the top edge open for now.
Next, repeat for the lining Front and Back. This time, leave a 4" opening along the bottom curved edge - you will use this to turn everything right side out at a later step.
Next, align the top edges of the lining and main fabric, four layers in total. Pin together.
Sew all the layers together along the top edge. Make sure you do not catch the webbing in your stitching (using a zipper foot helps). Trim corners and excess fabric. Turn the bag right side out through the opening you left in the lining.
Sew the opening in the lining closed with a slip stitch or machine stitch.
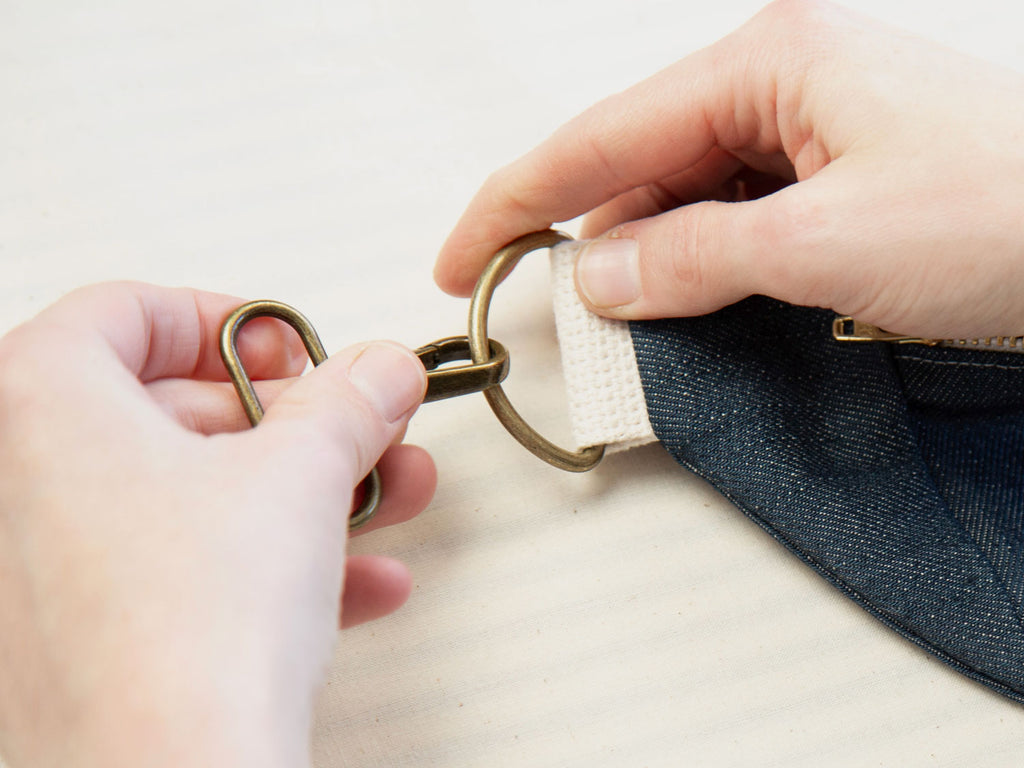
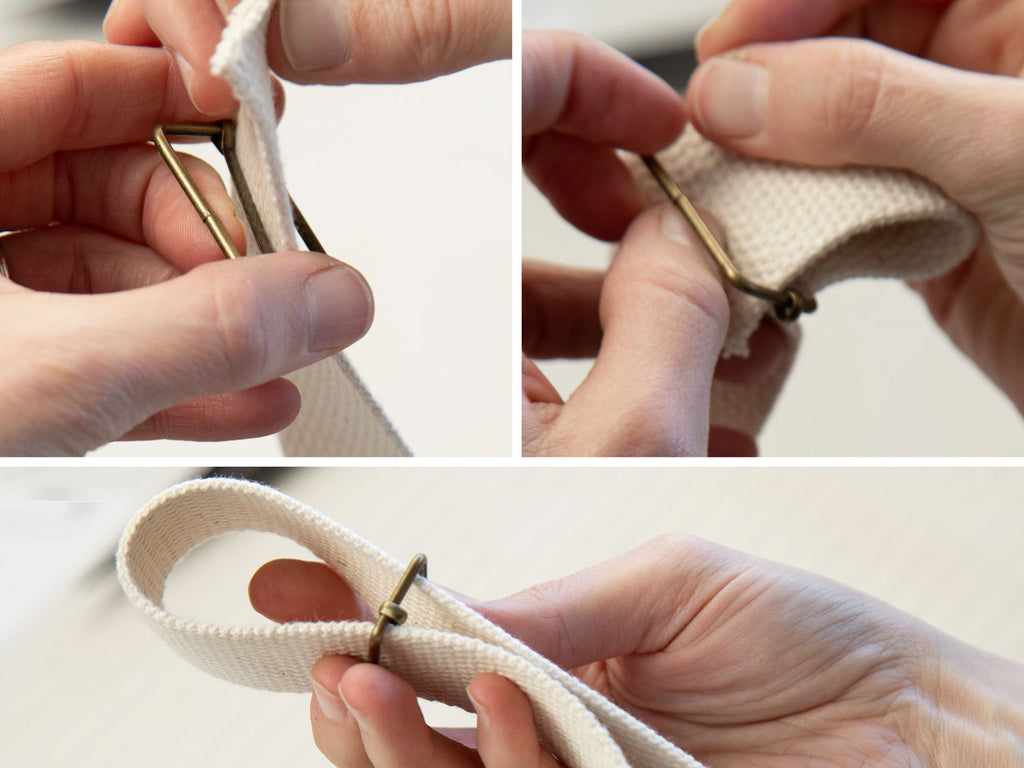
Step 8: Attach Slider Buckle and Swivel Hook
Attach swivel hook to D ring.
Pass the raw end of the webbing strap through the slider buckle, over the centre bar and back down. Leave excess and do not pull tight.
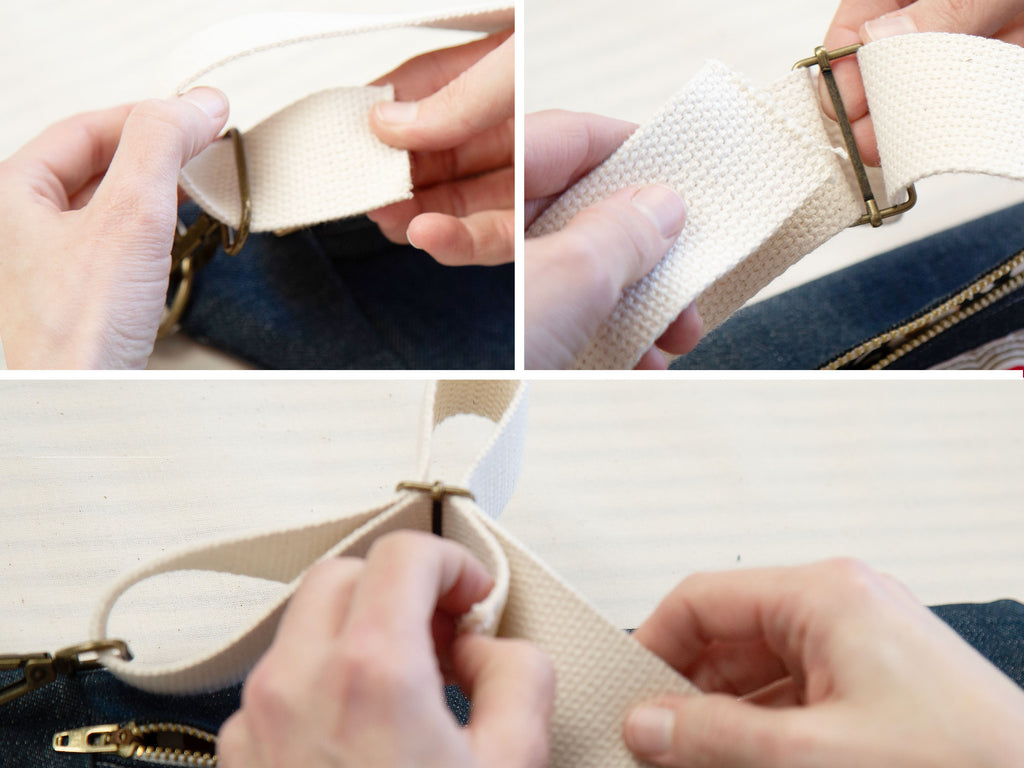
Next, pass it through the swivel hook. Pass it back through the slider buckle again, this time over the centre bar. Fold over centre bar towards the other side.
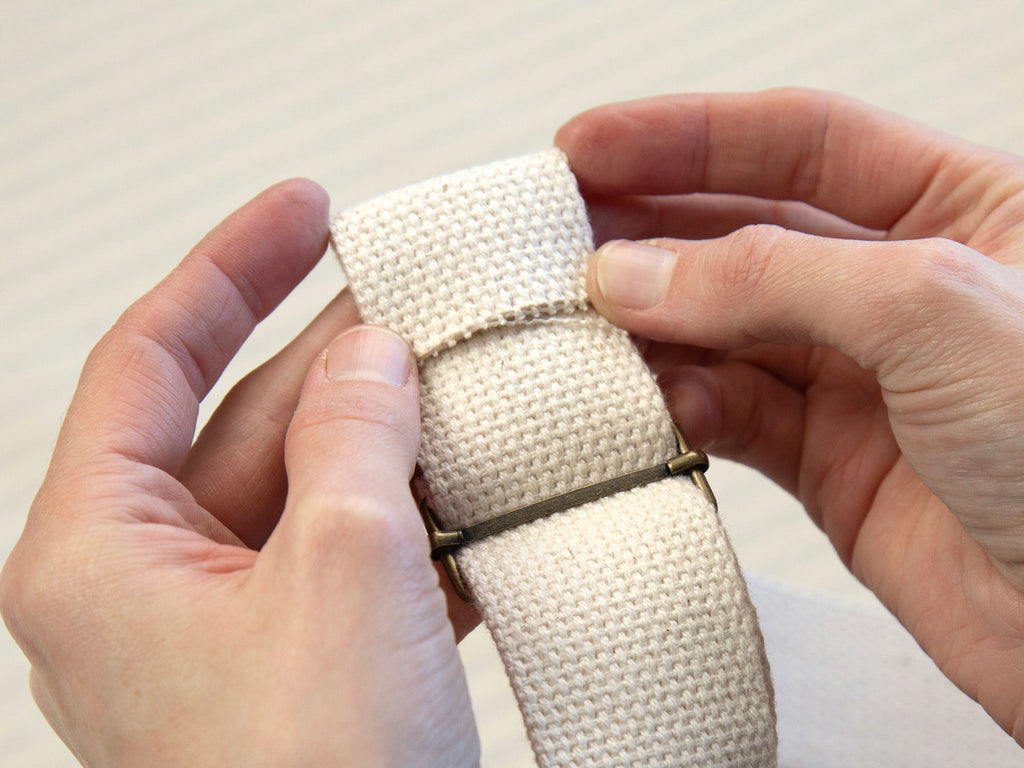
Adjust the length of the strap to your body. Depending on how you plan on wearing your belt bag, you can make it shorter and longer by sliding the webbing through the slider buckle. Cut excess webbing if necessary. Fold the raw end of the strap over the center bar so you have about 1.5" (38 mm) of excess.
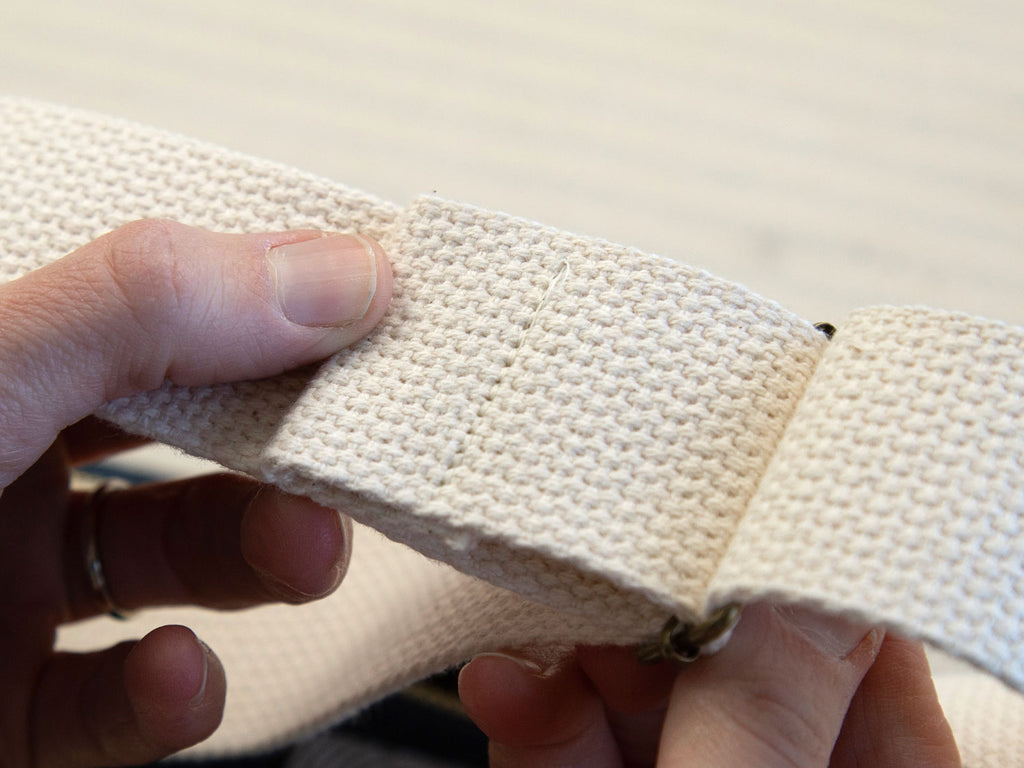
Stitch the raw end in place with a zig zag stitch, or fold the raw edge under and secure with two lines of stitching. Alternatively, you can sew a square with a cross through the middle for extra strength.
Ta-da! You did it! Give yourself a pat on the back for making your very own belt bag.
Whether you rock it as a fanny pack, sling it crossbody up front, or sport it at the back – it's all about showcasing your unique style! Don't forget to share your #CoreBeltBag moments on Instagram!
Emmanuelle
Emmanuelle is in charge of our marketing department and is voice behind our product descriptions, newsletters, videos, social posts, and blog. If there’s a textile pun to be made, she’ll find it.